Navigating marine audio installations requires careful planning and execution, prioritizing safety and reliable power distribution for optimal performance and longevity of your system․
Marine stereo systems differ significantly from automotive setups due to the harsh saltwater environment and the unique electrical demands of a boat․ Unlike cars, boats operate on 12V DC power, necessitating specific wiring techniques and components․ A well-designed system enhances the boating experience, providing entertainment while respecting the critical power needs for navigation and safety․
Prioritizing engine starting and battery charging is paramount; entertainment systems should be secondary․ Consider the potential for battery drain and implement solutions like a Yandina for intelligent battery management․ Selecting marine-grade components, resistant to corrosion and vibration, is crucial for long-term reliability․ Careful planning, considering speaker placement and amplifier power, ensures optimal sound quality and prevents electrical issues․
Safety Precautions for Boat Wiring

Boat wiring demands strict adherence to safety protocols due to the presence of water and flammable materials․ Always disconnect the battery’s negative terminal before commencing any electrical work to prevent short circuits and potential fires․ Utilize marine-grade tinned copper wire, designed to resist corrosion in saltwater environments․
Proper fuse and circuit breaker protection are non-negotiable, safeguarding against overloads and preventing damage to equipment and the boat itself․ Avoid mixing battery types, as this can lead to charging inefficiencies and potential hazards․ Regularly inspect wiring for damage, corrosion, or loose connections․ If unsure, consult a qualified marine electrician – safety should always be the top priority․
Essential Tools and Materials
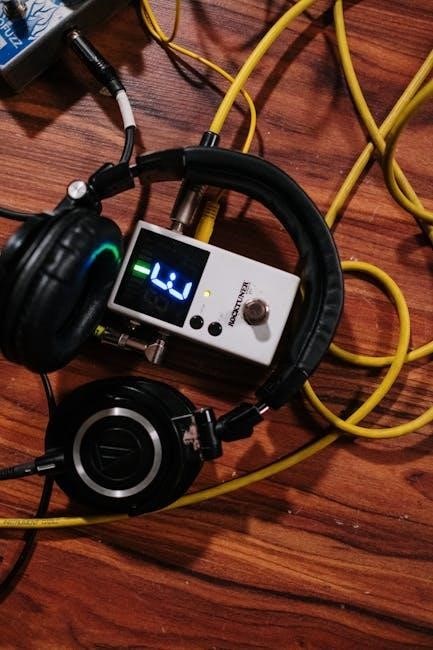
A successful boat stereo installation requires specific tools and materials․ You’ll need marine-grade tinned copper wire (various gauges), a wire stripper/crimper, heat shrink tubing, and a heat gun for secure connections․ A multimeter is crucial for testing voltage and continuity․
Essential materials include marine-grade fuses and circuit breakers, appropriately sized for your system, plus a fuse holder․ Don’t forget a drill with various bits for mounting components, and waterproof connectors to prevent corrosion․ Zip ties are invaluable for neat cable management․ Consider a Yandina for advanced battery management, and always have dielectric grease on hand for connector protection․
Understanding Boat Electrical Systems
Boat electrical systems differ significantly from automotive setups․ They primarily operate on 12V DC power, supplied by starting and deep-cycle batteries․ Starting batteries deliver high current for engine ignition, while deep-cycle batteries provide sustained power for accessories like stereos․
LiFePO4 batteries are a modern alternative, offering longer lifespan and consistent voltage․ Understanding battery capacity (amp-hours) is vital․ Avoid mixing battery types․ Prioritize maintaining sufficient power for engine starting; everything else is secondary․ A robust charging system is essential to replenish battery reserves, ensuring reliable operation of all onboard electrical components․

12V DC Power Basics
Marine systems universally utilize 12V DC power, a standard for compatibility and safety․ This direct current flows from the battery to components, powering everything from navigation lights to your stereo system․ Proper voltage maintenance is crucial; fluctuations can damage sensitive electronics․
Understanding polarity – positive (+) and negative (-) – is fundamental for correct wiring․ Incorrect connections can lead to blown fuses or, worse, system failure․ Wire gauge (thickness) dictates current-carrying capacity; larger gauges handle higher loads․ Always fuse circuits close to the power source for protection against shorts and overloads, safeguarding your boat’s electrical integrity․
Battery Types (Starting, Deep Cycle, LiFePO4)
Selecting the right battery is paramount for a robust marine stereo system․ Starting batteries deliver high current for short bursts, ideal for engine ignition․ Deep cycle batteries, conversely, provide sustained power over longer periods – perfect for running accessories like stereos․

Lithium Iron Phosphate (LiFePO4) batteries are gaining popularity due to their lightweight design, extended lifespan, and consistent voltage output․ Mixing battery types is generally discouraged, potentially causing charging inefficiencies․ Prioritize maintaining sufficient power for engine starting; a dedicated battery bank for audio ensures reliable performance without compromising essential functions․
Planning Your Stereo System Layout
Careful layout planning is crucial before commencing any boat stereo wiring․ Consider component placement for optimal acoustics and accessibility․ Locate the head unit within easy reach of the captain, while amplifiers should be positioned in a dry, well-ventilated area․
Plan speaker locations to distribute sound evenly throughout the boat․ Route wiring pathways strategically, avoiding potential hazards like sharp edges or moving parts․ Prioritize a clean, organized installation for easier troubleshooting and future upgrades․ Remember to account for power cable runs from the battery bank, ensuring adequate length and protection․

Wiring the Head Unit (Receiver)
Connecting the head unit requires meticulous attention to detail․ Begin with the power and ground connections, utilizing appropriately sized marine-grade wire․ Ensure a secure and corrosion-resistant connection to the boat’s 12V DC system․ A dedicated fuse, close to the power source, is essential for circuit protection․
Next, install the antenna, ensuring proper grounding to minimize interference․ Connect the antenna cable securely to the head unit․ Finally, connect the speaker wires, carefully observing polarity (positive and negative) to maintain proper sound reproduction․ Double-check all connections before powering on the system․
Power and Ground Connections
Establishing robust power and ground connections is paramount for a stable stereo system․ Utilize marine-grade tinned copper wire of the appropriate gauge – 6AWG is often suitable, but assess your amplifier’s power draw․ Connect the positive wire to a fused distribution block near the battery, ensuring the fuse rating matches the system’s requirements․
The ground connection is equally critical; connect it directly to the battery’s negative terminal or a designated grounding bus bar․ Avoid using the engine block as a ground, as it can introduce noise․ Secure all connections with marine-grade terminals and protect them from corrosion․
Antenna Installation
Proper antenna installation maximizes signal reception for your marine stereo․ Choose a location that’s clear of obstructions like radar arches or canvas tops․ Mount the antenna securely, utilizing a marine-grade mount designed for your boat’s construction․
Run the coaxial cable directly to the head unit, avoiding sharp bends and keeping it away from power cables to minimize interference․ Seal all entry points where the cable passes through the deck or hull with marine-grade sealant to prevent water intrusion․ A well-installed antenna ensures clear audio enjoyment while underway․
Amplifier Wiring
Amplifiers significantly boost your stereo’s power, demanding careful wiring practices․ Route the power cable directly from the battery, incorporating a fuse within 18 inches of the battery terminal for crucial protection․ Use appropriately sized gauge wire – heavier gauge for longer runs and higher power demands․
Connect a remote turn-on wire from the head unit to activate the amplifier when the stereo is powered on․ Ensure secure speaker wire connections, observing correct polarity (positive to positive, negative to negative)․ Proper grounding is vital; connect the amplifier’s ground wire to a solid, clean metal surface on the boat’s frame․
Power Cable Routing and Fuse Protection
Routing the amplifier’s power cable correctly is paramount for safety and performance․ Run the cable directly from the battery, avoiding sharp bends or potential pinch points․ Secure it properly using cable clamps to prevent chafing and shorts․ Crucially, install a fuse as close as possible to the battery – within 18 inches – to protect the entire circuit in case of a short․
Select a fuse amperage rating slightly higher than the amplifier’s maximum current draw․ This fuse acts as the first line of defense, preventing catastrophic damage and potential fire hazards․ Proper fuse selection and placement are non-negotiable for a safe marine audio system․
Remote Turn-On Wire Connection
The remote turn-on wire is essential for synchronizing the amplifier with the head unit․ This small-gauge wire signals the amplifier to power on when the stereo is activated, preventing constant power drain on the battery․ Connect the remote wire from the head unit’s remote output to the amplifier’s remote input terminal․
Ensure a secure connection to avoid intermittent operation․ Properly insulated connections are vital in the marine environment to prevent corrosion․ This wire doesn’t carry the main power; it’s simply a signal․ Without a functioning remote wire, the amplifier won’t activate when the stereo is turned on, resulting in no sound․
Speaker Wire Connections (Positive & Negative)
Maintaining correct polarity is crucial for optimal sound quality and speaker protection․ Connect the positive (+) wire from the amplifier to the positive (+) terminal on each speaker, and the negative (-) wire to the negative (-) terminal․ Inconsistent polarity can cause phase cancellation, resulting in weak bass and a muffled sound․
Use marine-grade speaker wire to resist corrosion and ensure a long-lasting connection․ Securely connect the wires using crimp connectors or solder, and protect the connections with heat shrink tubing․ Double-check all connections before powering up the system to prevent shorts or damage․
Speaker Installation and Wiring
Proper speaker placement significantly impacts sound quality; consider mounting locations that maximize coverage and minimize obstructions․ Ensure speakers are securely mounted to withstand boat movement and vibration, utilizing marine-grade hardware․ Route speaker wires neatly and protect them from chafing or damage, using conduit or loom where necessary․
When wiring speakers, adhere to the amplifier’s impedance guidelines to prevent overheating and distortion․ Parallel wiring reduces impedance, while series wiring increases it․ Always double-check polarity before connecting to the amplifier, ensuring positive to positive and negative to negative for optimal sound reproduction․
Subwoofer Wiring
Subwoofer wiring demands careful attention to impedance matching with your amplifier to avoid damage and ensure optimal performance․ Determine the subwoofer’s voice coil configuration (single or dual) and the amplifier’s minimum impedance rating․ Utilize appropriate gauge wire, typically lower gauge (thicker) for higher power subwoofers, to minimize resistance and maximize power transfer․
Series, parallel, or series-parallel configurations can adjust the overall impedance presented to the amplifier․ Incorrect wiring can lead to amplifier clipping or subwoofer damage․ Always verify connections with a multimeter before powering up the system, and prioritize secure, corrosion-resistant connections․
RGB Lighting Integration (Wet Sounds)
Integrating Wet Sounds RGB lighting enhances the visual experience, but requires dedicated wiring and control systems․ These systems typically utilize a central control module connected to the head unit or a dedicated remote․ Run separate, shielded wiring for RGB signals to prevent interference with audio cables․
Power the RGB controller from a switched source, ensuring it activates with the stereo system․ Carefully route wiring, protecting it from moisture and physical damage․ Utilize Wet Sounds’ proprietary connectors and wiring harnesses for seamless integration and reliable performance․ Proper grounding is crucial to eliminate noise and ensure vibrant, consistent lighting effects․
Troubleshooting Common Wiring Issues

Marine stereo wiring can present unique challenges, often stemming from corrosion or loose connections․ Begin by visually inspecting all connections for signs of corrosion, ensuring they are clean and tight․ A multimeter is invaluable for testing voltage and continuity, pinpointing breaks in the wiring․ No sound? Check the head unit’s fuse, amplifier power connections, and speaker wiring․
Persistent noise? Investigate grounding issues, ensuring a solid ground connection for all components․ If using a Yandina, verify its proper operation․ Remember to replace any damaged wiring immediately and utilize marine-grade connectors to prevent future problems․ Prioritize safety and disconnect power before troubleshooting․
Marine Fuse and Circuit Breaker Selection
Protecting your boat’s electrical system is paramount, and proper fuse and circuit breaker selection is crucial․ Always use marine-grade fuses and breakers designed to withstand the harsh marine environment․ Size fuses appropriately for each circuit, considering the amperage draw of connected devices – amplifiers, stereos, and lighting․ Never over-fuse!
Fuse both legs of critical circuits, like bilge pumps, for redundancy․ Circuit breakers offer resettable protection, while fuses require replacement․ Consider the location; easily accessible breakers are preferred․ Prioritize safety and adhere to ABYC standards for optimal protection and prevent potential fire hazards․ A Yandina can aid in overall battery and circuit management․
Bilge Pump Wiring Considerations

Bilge pump wiring demands utmost reliability, as it’s a critical safety system․ Avoid fusing both legs of the same bilge pump circuit – a single point of failure could be catastrophic․ Highly recommended is the Water Witch bilge pump switch, offering jam-proof operation due to its lack of moving parts․ Install a separate, dedicated circuit for a high-capacity Rule 3500 bilge pump, providing crucial backup․
This secondary pump can buy valuable time in an emergency․ Ensure proper wire gauge for the pump’s amperage draw․ Prioritize a direct connection to the battery, bypassing switches where possible, for immediate operation․ Regular inspection and testing are vital for dependable performance․
Using a Yandina for Battery Management
A Yandina offers a sophisticated alternative to manual battery switches, streamlining power distribution and enhancing safety․ It eliminates the need for manually paralleling batteries, a common practice prone to error․ Avoid mixing battery types within a single bank; Yandina excels at managing separate systems․ While paralleling the house bank to the start bank is possible, it risks draining the starting battery․
The Yandina incorporates an emergency parallel function, replicating the safety of a traditional switch․ It’s particularly beneficial for systems with LiFePO4 batteries powering stereos, ensuring engine starting remains unaffected by audio system demands․
Hiring a Marine Electrician
Complex boat stereo installations benefit significantly from professional expertise․ A qualified marine electrician can expertly design a system tailored to your vessel and power needs, ensuring compliance with safety standards․ Even if you’re comfortable with DIY wiring, consulting an electrician during the planning phase can prevent costly mistakes and potential hazards․
They’ll assess your existing electrical system, recommend appropriate components, and ensure proper fuse and circuit breaker protection․ Prioritize an electrician experienced with marine environments and ABYC standards․ This investment safeguards your equipment, your boat, and ultimately, your safety on the water․