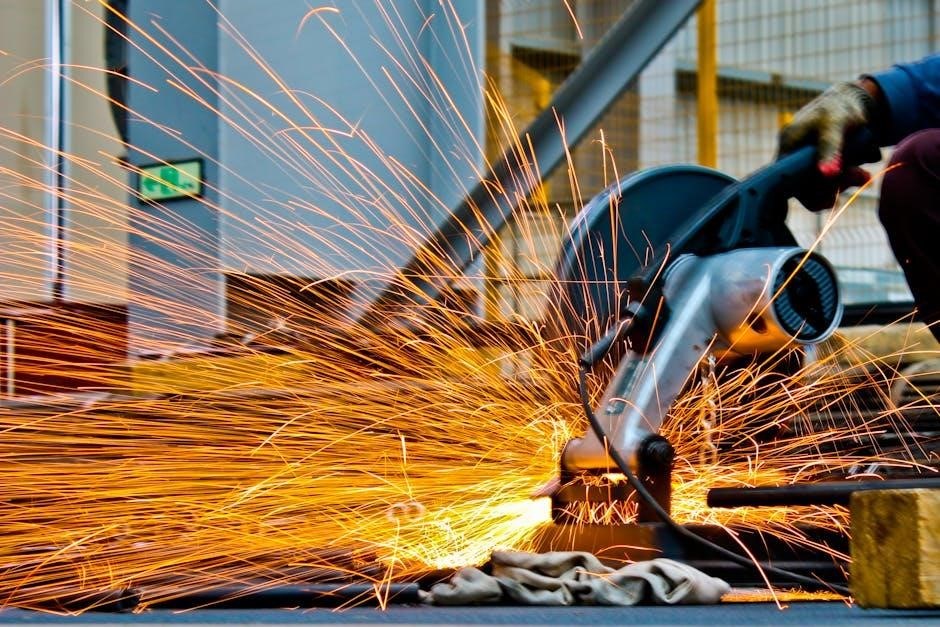
Safety Precautions
Always follow safety guidelines when operating the Miller Maxstar 210․ Wear protective gear‚ ensure proper ventilation‚ and avoid high-voltage exposure․ Read the manual thoroughly before use․
- Avoid electric shock by keeping the unit dry and grounded․
- Use approved welding accessories to prevent accidents․
- Follow all warnings and instructions in the manual․
Safety is critical to ensure optimal performance and longevity of the equipment․
1․1․ General Safety Guidelines
Adhere to all safety protocols when using the Miller Maxstar 210 to minimize risks․ Always wear approved protective gear‚ including gloves‚ safety glasses‚ and a welding helmet․ Ensure proper ventilation to avoid inhaling fumes․ Keep the work area clean and dry to prevent electrical hazards․ Never touch live electrical parts or operate the machine near flammable materials․ Follow the manufacturer’s instructions for installation‚ operation‚ and maintenance․ Regularly inspect the equipment for damage and ensure all connections are secure․ Proper grounding is essential to prevent electric shock․ Always disconnect the power source before performing maintenance․ Read the manual thoroughly to understand all safety precautions and operational guidelines․ Safety is paramount to ensure safe and efficient welding operations․
1․2․ Specific Hazards for Installation‚ Operation‚ and Maintenance

Beware of specific hazards during installation‚ operation‚ and maintenance of the Miller Maxstar 210․ Electrical shock is a primary risk; ensure the unit is properly grounded and keep it dry․ During operation‚ high-voltage components can cause injury if mishandled․ Use insulated tools and avoid contact with live parts․ When maintaining‚ disconnect power before servicing․ Fumes from welding can be hazardous‚ so ensure good ventilation․ Properly store and handle welding consumables to prevent accidents․ Always follow the manual’s guidelines for safe installation‚ operation‚ and maintenance procedures to minimize risks and ensure safe usage․

Features of the Miller Maxstar 210
The Miller Maxstar 210 offers advanced features like Auto-Line technology for versatile power input‚ Blue Lightning high-frequency arc initiation‚ and a digital display for precise control․
2․1․ Key Specifications and Capabilities
The Miller Maxstar 210 is designed for both TIG and Stick welding‚ offering a wide output range․ It features a compact‚ portable design with a robust build for durability․ The unit is equipped with advanced technologies like Auto-Line‚ allowing operation on various power sources (120-480V)․ It also includes high-frequency arc initiation for consistent starts and a digital interface for easy parameter adjustments‚ making it versatile for diverse welding applications and ensuring high-quality results across different materials and thicknesses․
2․2․ Auto-Line Technology for Versatile Power Input
The Miller Maxstar 210 features Auto-Line technology‚ enabling operation on various power sources from 120 to 480 volts․ This versatility allows seamless use across different environments without manual adjustments․ The technology ensures consistent performance regardless of input voltage‚ making it ideal for both workshop and field applications․ Its adaptive capability minimizes setup time and enhances portability‚ while maintaining high-quality welding results․ This feature is particularly beneficial for professionals needing reliable performance in diverse power conditions‚ ensuring efficiency and flexibility in their work․
2․3․ Digital Display and Control

The Miller Maxstar 210 is equipped with an intuitive digital display‚ offering precise control over welding parameters․ The clear interface allows easy adjustment of voltage‚ current‚ and pulse settings‚ ensuring accurate customization for various materials and techniques․ The digital controls enable quick access to preset options‚ enhancing workflow efficiency․ Real-time monitoring of welding settings through the display helps maintain consistency and quality․ This advanced interface simplifies operation‚ making it user-friendly for both experienced professionals and newcomers‚ while ensuring optimal performance in demanding applications․
2․4․ Blue Lightning High-Frequency Arc Initiation
The Miller Maxstar 210 features Blue Lightning technology‚ a high-frequency arc initiation system․ This advanced feature provides consistent and reliable arc ignition‚ minimizing contamination and ensuring stable welding performance․ It operates without physical contact‚ reducing wear on consumables and extending their lifespan․ Blue Lightning enhances control during the welding process‚ making it ideal for precision work․ The technology is particularly effective in TIG welding applications‚ offering smooth arc starting and maintaining consistent energy transfer for high-quality results․
- Consistent arc ignition for precise control․
- Reduces consumable wear and tear․
- Enhances stability in TIG welding processes․
Blue Lightning technology ensures reliable and high-performance welding experiences․
Installation and Setup
Connect the Miller Maxstar 210 to a suitable power source‚ ensuring proper grounding․ Follow manual instructions for installing and configuring welding equipment for optimal performance․
- Ensure all connections are secure and meet safety standards․
- Configure equipment according to the manual’s guidelines․
Proper installation ensures safe and efficient welding operations․
3․1․ Connecting the Unit to Power Sources
Connect the Miller Maxstar 210 to a compatible power source‚ ensuring proper voltage and grounding․ Use the Auto-Line technology for flexible power input (120-480V)․ Follow manual instructions for secure connections and verify all electrical requirements before operation․
- Ensure the power source matches the unit’s specifications․
- Use approved connectors to avoid electrical hazards․
- Check for proper grounding to prevent shock risks․
Correct power connection ensures safe and efficient performance of the welding unit․
3․2․ Setting Up the Welding Equipment
Set up the Miller Maxstar 210 by connecting the welding torch and work cable․ Ensure all connections are secure and properly insulated․ Refer to the manual for specific setup instructions tailored to your welding process‚ such as TIG or pulsed TIG․ Calibrate settings according to material thickness and desired weld quality․ Always test the equipment at low power before full operation to ensure proper function․
- Connect the torch and cable correctly to avoid damage․
- Adjust settings based on material and process requirements․
- Test the equipment to ensure optimal performance․
Proper setup ensures safe and efficient welding operations with the Maxstar 210․
Welding Processes and Modes
The Miller Maxstar 210 supports TIG (GTAW) and pulsed TIG welding‚ offering precise control for various materials and applications․ Its adaptability ensures high-quality welds across different modes․
- TIG welding for clean‚ precise joints․
- Pulsed TIG for advanced‚ heat-sensitive applications․
These processes enhance versatility and performance in welding tasks․
4․1․ TIG (GTAW) Welding Capabilities
The Miller Maxstar 210 excels in TIG (GTAW) welding‚ offering exceptional precision and control․ It is ideal for welding thin materials and achieving high-quality‚ clean joints․ The machine supports various shielding gases‚ ensuring versatility in different applications․ With its stable arc and consistent performance‚ it is suitable for both manual and automated welding processes․ The Maxstar 210’s TIG capabilities make it a reliable choice for professionals seeking accurate and durable welds across a range of industries․
4․2․ Pulsed TIG Welding for Advanced Applications
The Miller Maxstar 210 offers advanced pulsed TIG welding capabilities‚ ideal for complex and precise applications․ Pulsed TIG allows for better control over heat input‚ reducing distortion and improving weld quality․ This mode is particularly useful for thin materials‚ aesthetic welds‚ and applications requiring minimal penetration․ The machine enables adjustable pulse parameters‚ including frequency and amplitude‚ to customize the welding process․ With its digital controls‚ the Maxstar 210 delivers consistent and repeatable results‚ making it a versatile tool for professionals tackling advanced welding tasks․
Maintenance and Troubleshooting
Regularly inspect and clean the Miller Maxstar 210 to ensure optimal performance․ Refer to the manual for troubleshooting common issues like arc instability or power fluctuations;
- Check cooling systems and replace worn parts promptly․
- Follow maintenance schedules to prevent premature wear․
Proper upkeep extends the lifespan and efficiency of the equipment․
5․1․ Routine Maintenance Procedures
Regular maintenance is crucial for the Miller Maxstar 210․ Start by cleaning the unit‚ paying attention to fans and vents to ensure proper airflow․ Check and replace air filters as needed to prevent dust buildup․ Inspect all electrical connections and tighten any loose terminals․ Lubricate moving parts and check the condition of welding cables and connectors․ Refer to the manual for specific maintenance schedules and procedures to ensure optimal performance and longevity of the equipment․ Always follow safety guidelines during maintenance to avoid potential hazards․ Additionally‚ ensure all components are cool before servicing to prevent burns or injuries․ Regular maintenance not only prevents unexpected downtime but also ensures consistent welding quality and extends the lifespan of the machine․ By adhering to these routine procedures‚ users can maintain the reliability and efficiency of their Miller Maxstar 210․ This approach helps in identifying and addressing potential issues early‚ thereby minimizing the risk of major repairs and ensuring uninterrupted operation․ Proper maintenance also contributes to energy efficiency and cost savings over time․ Always keep the manual handy for detailed instructions and guidelines tailored to the specific needs of the Miller Maxstar 210․ Following these steps ensures the equipment operates safely and effectively‚ meeting the high standards expected from Miller Electric products․
5․2․ Common Issues and Solutions
Common issues with the Miller Maxstar 210 include inconsistent arc initiation and poor weld quality․ For arc issues‚ check the Blue Lightning HF module and ensure settings match the welding process․ Poor weld quality may result from incorrect polarity or contaminated materials․ Verify connections and clean materials thoroughly․ If the machine displays error codes‚ refer to the manual for troubleshooting․ Power fluctuations can cause instability‚ so ensure the input voltage is within the specified range․ Always consult the manual for detailed solutions and follow safety guidelines during repairs․ If issues persist‚ contact Miller support for assistance․ Regular maintenance can prevent many of these problems‚ ensuring smooth operation and consistent results․ By addressing issues promptly‚ users can maintain the performance and reliability of their Miller Maxstar 210․ Proper troubleshooting and maintenance are key to extending the lifespan of the equipment and achieving professional-grade welds․ Always follow the manufacturer’s guidelines for resolving issues to avoid further complications and ensure safety․ This approach ensures the Miller Maxstar 210 continues to deliver exceptional welding performance․

Accessories and Consumables
Explore compatible accessories like Dinse-35 connectors and welding torches․ Ensure optimal performance with recommended consumables tailored for the Miller Maxstar 210․
- Dinse-35 connectors for secure connections․
- High-quality welding torches for precise control․
- Recommended consumables for consistent weld quality․
6․1․ Compatible Accessories for the Maxstar 210
The Miller Maxstar 210 supports a range of accessories to enhance welding efficiency․ These include Dinse-35 connectors‚ welding torches‚ and other specialized components․ Ensure compatibility to maintain performance․
- Dinse-35 connectors for secure‚ high-current connections․
- Welding torches designed for precise control and durability․
- Other accessories like cables and adapters for customization․
- Original Miller parts ensure optimal functionality and safety․
Using genuine accessories guarantees reliability and extends equipment lifespan․

6․2․ Recommended Consumables for Optimal Performance
Using high-quality consumables ensures the Miller Maxstar 210 operates at its best․ Genuine Miller parts like tungsten electrodes‚ collets‚ and nozzles are recommended for consistent performance․
- High-quality tungsten electrodes for precise arc control․
- Genuine collets and nozzles to maintain optimal arc performance․
- Regularly replace consumables to prevent downtime and maintain weld quality․
- Original Miller consumables are designed to meet the machine’s specifications․
Using recommended consumables ensures longevity and consistent welding results․
Technical Specifications
The Miller Maxstar 210 features an output range of 5-210 amps with a 60% duty cycle at 210 amps․ It weighs 38 lbs and includes Auto-Line technology․
7․1․ Output Range and Duty Cycle
The Miller Maxstar 210 offers an output range of 5-210 amps‚ providing versatility for various welding tasks․ It operates at a 60% duty cycle at 210 amps‚ ensuring consistent performance․ This duty cycle allows for extended welding sessions without overheating‚ making it ideal for demanding applications․ The unit’s power efficiency and thermal management ensure reliability‚ even in high-demand environments․ These specifications make the Maxstar 210 suitable for both light and heavy-duty welding projects‚ delivering consistent and precise results․ Proper adherence to the duty cycle ensures optimal equipment longevity and performance․ Always refer to the manual for specific operational guidelines to maintain efficiency and safety․
7․2․ Dimensions and Weight
The Miller Maxstar 210 has compact dimensions and a lightweight design‚ making it easy to transport and use in various work environments․ Its dimensions are carefully engineered to ensure portability without compromising performance․ The unit’s weight is optimized for durability and ease of handling‚ allowing users to maneuver it effortlessly․ For precise measurements‚ refer to the manual‚ which provides exact details on the product’s dimensions and weight to assist in planning and setup․ This design ensures the Maxstar 210 is both practical and efficient for welding tasks․
The Miller Maxstar 210 is a powerful‚ versatile welding tool with advanced features like Auto-Line and digital controls․ Its compact design and high performance make it ideal for professionals seeking reliable and efficient welding solutions․
8;1․ Summary of Key Features and Benefits
The Miller Maxstar 210 offers exceptional welding performance with its advanced Auto-Line technology‚ enabling operation on various power inputs․ The digital display provides precise control‚ while Blue Lightning high-frequency arc initiation ensures consistent starts․ Its compact design and lightweight construction enhance portability‚ making it ideal for both shop and field use․ The unit supports TIG (GTAW) and pulsed TIG welding‚ catering to diverse applications․ These features combine to deliver unparalleled versatility‚ efficiency‚ and reliability for professionals seeking high-quality welding results․
8․2․ Final Tips for Getting the Most Out of the Maxstar 210
To maximize the performance of the Miller Maxstar 210‚ ensure regular maintenance and adhere to the manual’s guidelines․ Utilize the Auto-Line technology for versatile power input and leverage the digital display for precise control․ Clean the unit regularly to prevent dust buildup and maintain optimal functionality․ For advanced applications‚ explore the Pulsed TIG mode for superior weld quality․ Always use recommended consumables to ensure consistency and longevity․ By following these tips‚ you can unlock the full potential of the Maxstar 210 and achieve professional-grade welding results consistently․